> ## Documentation Index
> Fetch the complete documentation index at: https://docs.anymorph.ai/llms.txt
> Use this file to discover all available pages before exploring further.
# Your first week
> From signing in to publishing your first draft, in the order that actually works
Once your workspace is ready, most of the measuring and writing runs on its own. Your first week is really three jobs: **check that we're measuring the right things**, **get three connections in place**, and **review and publish your first drafts**. Work through it in this order.
If you joined by invitation, you skip the setup screens entirely and land straight in the workspace. Skip the domain step below and start at **Overview**.
## Day 1 — Sign in and find your workspace
Signing in drops you on the workspace's **Visibility** screen. Clicking the logo, or switching workspaces, always brings you back here.
New workspaces start at **Enter your domain**. Just the address is enough — `example.com`. The `https://` is stripped as you type and `www.` is dropped. You can include a path (`example.com/en`) if you want the analysis pointed at one section of the site.
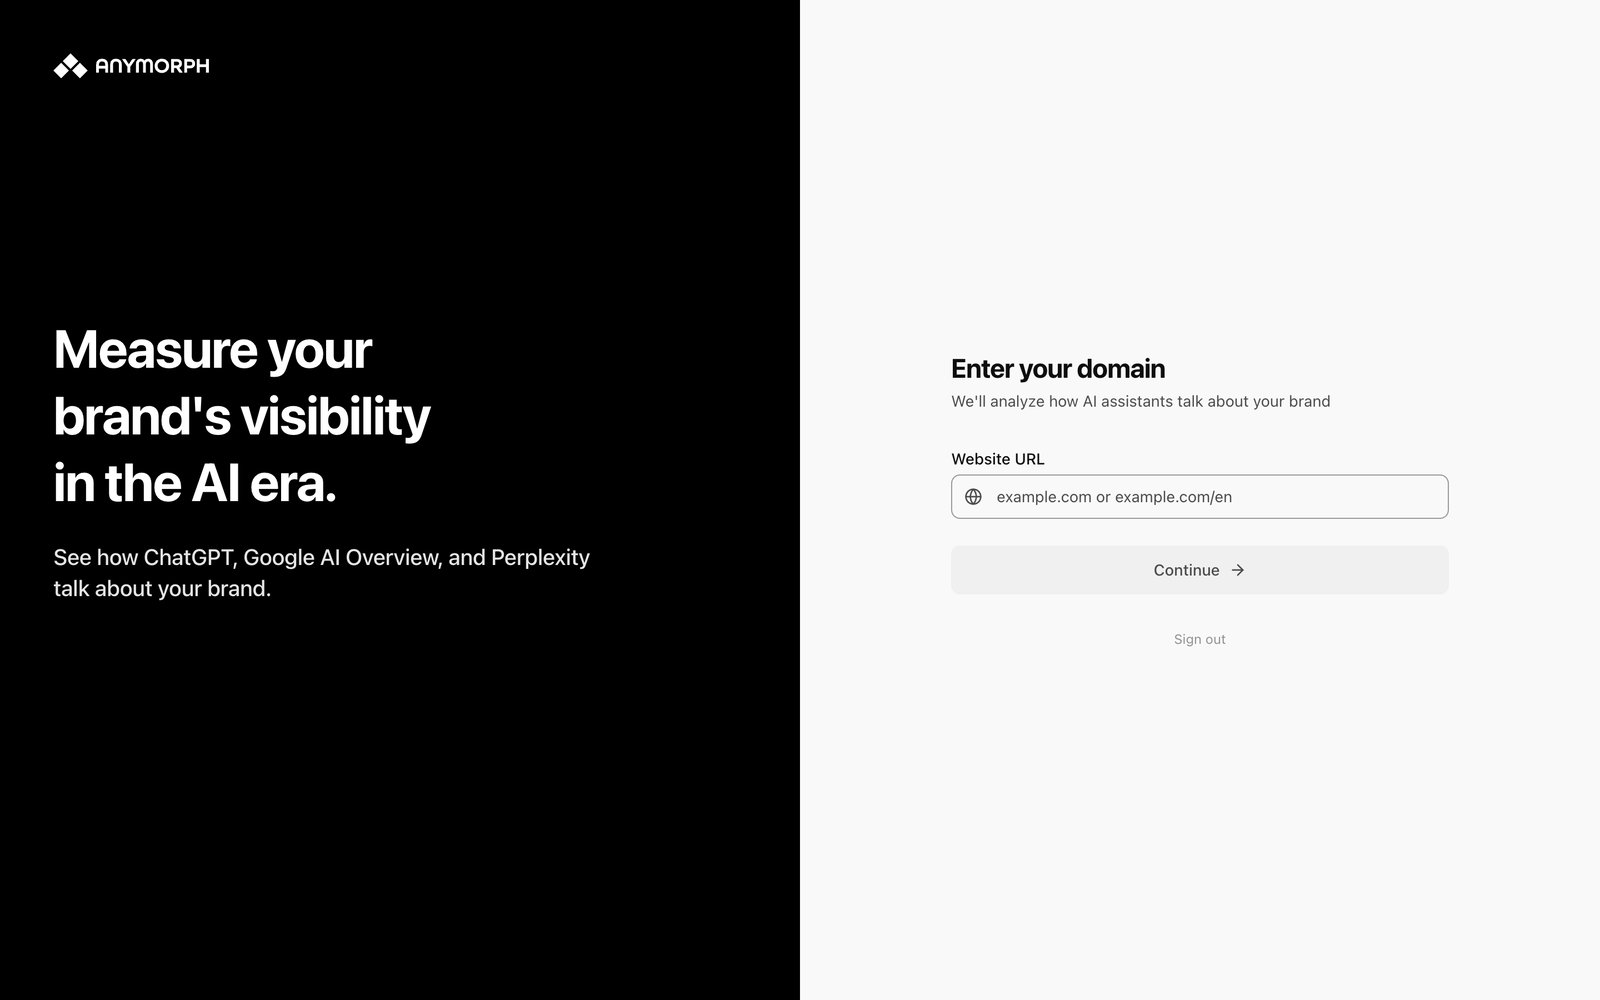 You can only create a workspace for your own company's domain. If your email domain doesn't match the address you typed, you'll see **Email domain mismatch** — ask an admin of that workspace to invite you instead. The full flow is in the [onboarding guide](/guides/onboarding).
**Overview**, the first item in the sidebar, is your week at a glance: what was written, what's waiting for review, and how mention rate and share of voice moved.
You can only create a workspace for your own company's domain. If your email domain doesn't match the address you typed, you'll see **Email domain mismatch** — ask an admin of that workspace to invite you instead. The full flow is in the [onboarding guide](/guides/onboarding).
**Overview**, the first item in the sidebar, is your week at a glance: what was written, what's waiting for review, and how mention rate and share of voice moved.
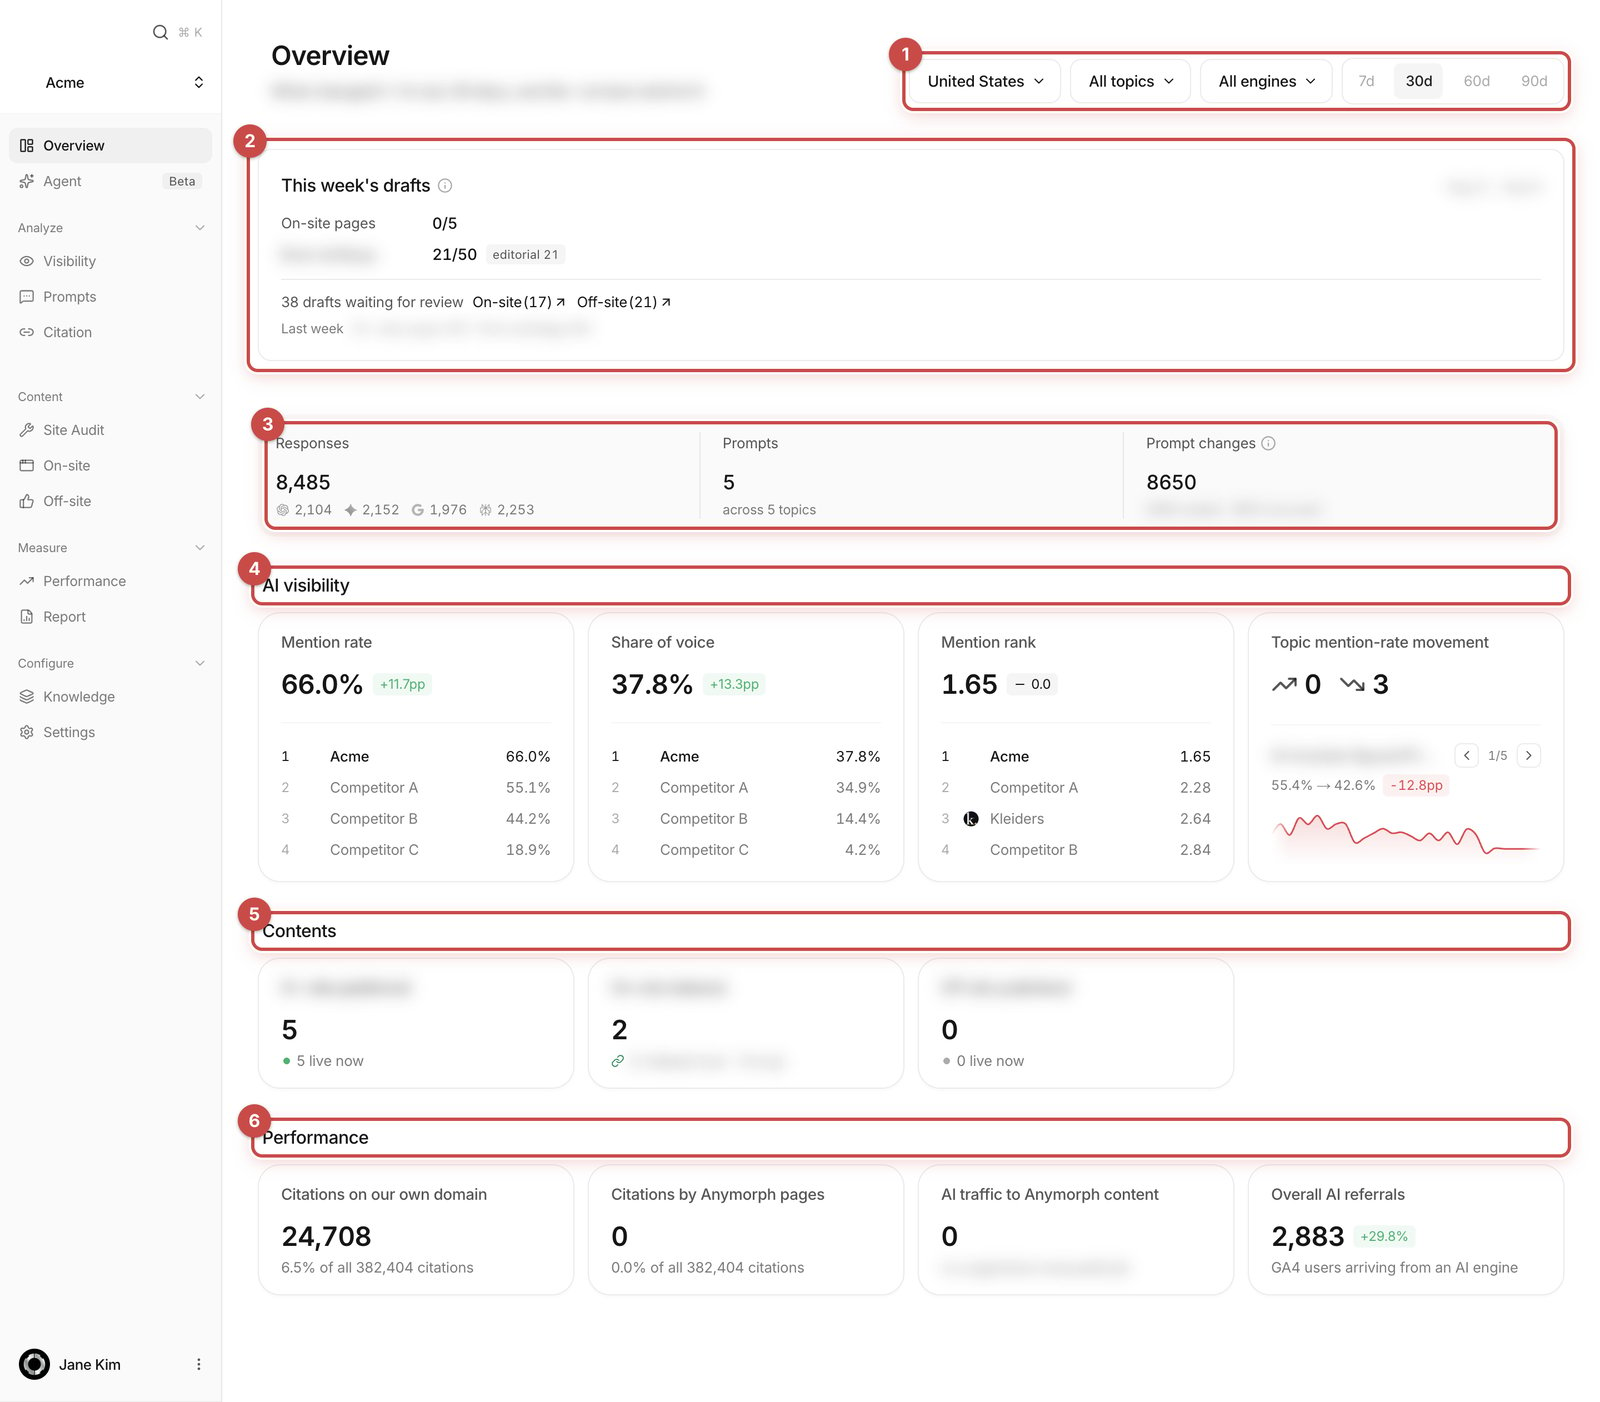 The numbered areas are explained on the [Overview](/dashboard/overview) page.
## Day 2 — Check what we're measuring
Every number is calculated against your prompts. If the questions don't match your business, nothing downstream is right either. That's why this comes first.
Open **Prompts** and read the topic names. You're only checking two things: are these the subjects you actually compete on, and is anything obvious missing? You don't need to polish individual wording.
If something needs to change, see [editing prompts](/guides/editing-prompts). You can edit wording on screen, or ask the AI chat at the top right in plain language.
**Knowledge** holds Brand.md and Content.md. Every page written from now on is grounded in those two documents.
A wrong fact in Brand.md doesn't stay in one page — it goes into every page written after it. Fix it there and it disappears from everything generated later. This is the highest-value half hour of your first week. See [the Knowledge feedback loop](/guides/knowledge-feedback-loop).
If you have banned phrases, an exact product lineup, or required disclaimers, write them into Content.md now. It is far faster than correcting drafts one at a time.
## Day 3 — Get three connections in place
These three make publishing and performance measurement work end to end. They often need someone else at your company, so start early.
This is what lets your published pages be served on your own domain. Follow the [connect your domain guide](/guides/connect-domain); the screen itself is [Settings › Domain](/settings/domain). You'll usually need whoever manages your company's web infrastructure.
Needed to see whether your published pages made it into Google's index, and to request indexing. See [Search Console and indexing](/guides/search-console-indexing).
Connect it in [Settings › Integrations](/settings/integrations). Without it, the **Overall AI referrals** card on Overview reads **Not connected** rather than zero, and you can't see visitors arriving from an AI engine.
## Days 4–5 — Review and publish your first drafts
Under this week's drafts card on **Overview** there are **On-site (n)** and **Off-site (n)** links that take you straight to the review queue. A draft counts there as soon as it's written — review and publishing come after.
A GEO page isn't an article someone reads start to finish. It's material an AI engine cites while answering a question. So you can skip the things you'd normally flag: a flat opening, a table-heavy structure, the length.
Four things are worth your attention: **wrong facts** (specs, feature names, prices, coverage, launch dates, figures), **missing essentials** (a condition or strength this topic must include), **phrasing you can't use** (regulatory, legal, or internal rules), and **formats you want repeated** (a CTA link at the bottom, a pricing convention). The full checklist is in [reviewing content](/guides/reviewing-content).
You can type directly into the draft the way you'd edit a blog post, or ask the AI chat for a specific change — name the sentence and the direction ("make this one sentence less absolute"). The editing screen is covered in [page editor](/dashboard/page-editor). When it reads right, press **Publish**.
Anything you found in one page is probably in others, or will be in the next batch. Move wrong facts and missing information into Brand.md; move phrasing rules and repeated formats into Content.md.
## Invite your team
If colleagues will review with you, invite them from [Settings › Team](/settings/team) with **Add Member**. You can paste several email addresses at once and set each one as **Member** (can view data and run analysis) or **Admin** (also settings, billing and adding members). Invitation links expire after 7 days and can be re-sent.
## Your weekly routine after that
Once week one is done, fifteen minutes covers it.
How much was written, how much is waiting for you. If the numbers jumped, check **Prompt changes** first: when the prompt panel changes, the figures move even if nothing changed for the brand.
See which topics pushed mention rate, share of voice and mention rank up or down. [Reading the numbers](/guides/reading-the-numbers) explains how to interpret them.
Work through the On-site and Off-site drafts, and fold this week's feedback back into the two Knowledge documents.
## Related
What gets built while your workspace is being prepared.
Every sidebar item in one table.
What to check in a draft, and what to let go.
The questions that come up most in week one.
The numbered areas are explained on the [Overview](/dashboard/overview) page.
## Day 2 — Check what we're measuring
Every number is calculated against your prompts. If the questions don't match your business, nothing downstream is right either. That's why this comes first.
Open **Prompts** and read the topic names. You're only checking two things: are these the subjects you actually compete on, and is anything obvious missing? You don't need to polish individual wording.
If something needs to change, see [editing prompts](/guides/editing-prompts). You can edit wording on screen, or ask the AI chat at the top right in plain language.
**Knowledge** holds Brand.md and Content.md. Every page written from now on is grounded in those two documents.
A wrong fact in Brand.md doesn't stay in one page — it goes into every page written after it. Fix it there and it disappears from everything generated later. This is the highest-value half hour of your first week. See [the Knowledge feedback loop](/guides/knowledge-feedback-loop).
If you have banned phrases, an exact product lineup, or required disclaimers, write them into Content.md now. It is far faster than correcting drafts one at a time.
## Day 3 — Get three connections in place
These three make publishing and performance measurement work end to end. They often need someone else at your company, so start early.
This is what lets your published pages be served on your own domain. Follow the [connect your domain guide](/guides/connect-domain); the screen itself is [Settings › Domain](/settings/domain). You'll usually need whoever manages your company's web infrastructure.
Needed to see whether your published pages made it into Google's index, and to request indexing. See [Search Console and indexing](/guides/search-console-indexing).
Connect it in [Settings › Integrations](/settings/integrations). Without it, the **Overall AI referrals** card on Overview reads **Not connected** rather than zero, and you can't see visitors arriving from an AI engine.
## Days 4–5 — Review and publish your first drafts
Under this week's drafts card on **Overview** there are **On-site (n)** and **Off-site (n)** links that take you straight to the review queue. A draft counts there as soon as it's written — review and publishing come after.
A GEO page isn't an article someone reads start to finish. It's material an AI engine cites while answering a question. So you can skip the things you'd normally flag: a flat opening, a table-heavy structure, the length.
Four things are worth your attention: **wrong facts** (specs, feature names, prices, coverage, launch dates, figures), **missing essentials** (a condition or strength this topic must include), **phrasing you can't use** (regulatory, legal, or internal rules), and **formats you want repeated** (a CTA link at the bottom, a pricing convention). The full checklist is in [reviewing content](/guides/reviewing-content).
You can type directly into the draft the way you'd edit a blog post, or ask the AI chat for a specific change — name the sentence and the direction ("make this one sentence less absolute"). The editing screen is covered in [page editor](/dashboard/page-editor). When it reads right, press **Publish**.
Anything you found in one page is probably in others, or will be in the next batch. Move wrong facts and missing information into Brand.md; move phrasing rules and repeated formats into Content.md.
## Invite your team
If colleagues will review with you, invite them from [Settings › Team](/settings/team) with **Add Member**. You can paste several email addresses at once and set each one as **Member** (can view data and run analysis) or **Admin** (also settings, billing and adding members). Invitation links expire after 7 days and can be re-sent.
## Your weekly routine after that
Once week one is done, fifteen minutes covers it.
How much was written, how much is waiting for you. If the numbers jumped, check **Prompt changes** first: when the prompt panel changes, the figures move even if nothing changed for the brand.
See which topics pushed mention rate, share of voice and mention rank up or down. [Reading the numbers](/guides/reading-the-numbers) explains how to interpret them.
Work through the On-site and Off-site drafts, and fold this week's feedback back into the two Knowledge documents.
## Related
What gets built while your workspace is being prepared.
Every sidebar item in one table.
What to check in a draft, and what to let go.
The questions that come up most in week one.